nthKey Tutorial
Prerequisites:
- install NthKey from the App Store
- at least one other (hardware) wallet
Wallet setup
You will be using Specter Desktop to configure a multisig wallet consisting of your iOs device and at least one other hardware wallet.
After that you can either use Specter or just Bitcoin Core to generate receive addresses, which you can verify in the NthKey app. Similarly you can use either Bitcoin Core or Specter to compose and sign transactions, but the latter will be easier.
Install Bitcoin Core
You may optionally skip this step and have Specter install Bitcoin Core for you.
Download the most recent release.
In order to test without putting any real coins at risk, launch with -signet on macOS:
/Applications/Bitcoin-Qt.app/Contents/MacOS/Bitcoin-Qt -signet
We strongly recommend practicing this setup with signet before using real bitcoin on mainnet.
Install Specter Desktop
Download the most recent version here.
Configure the wallet
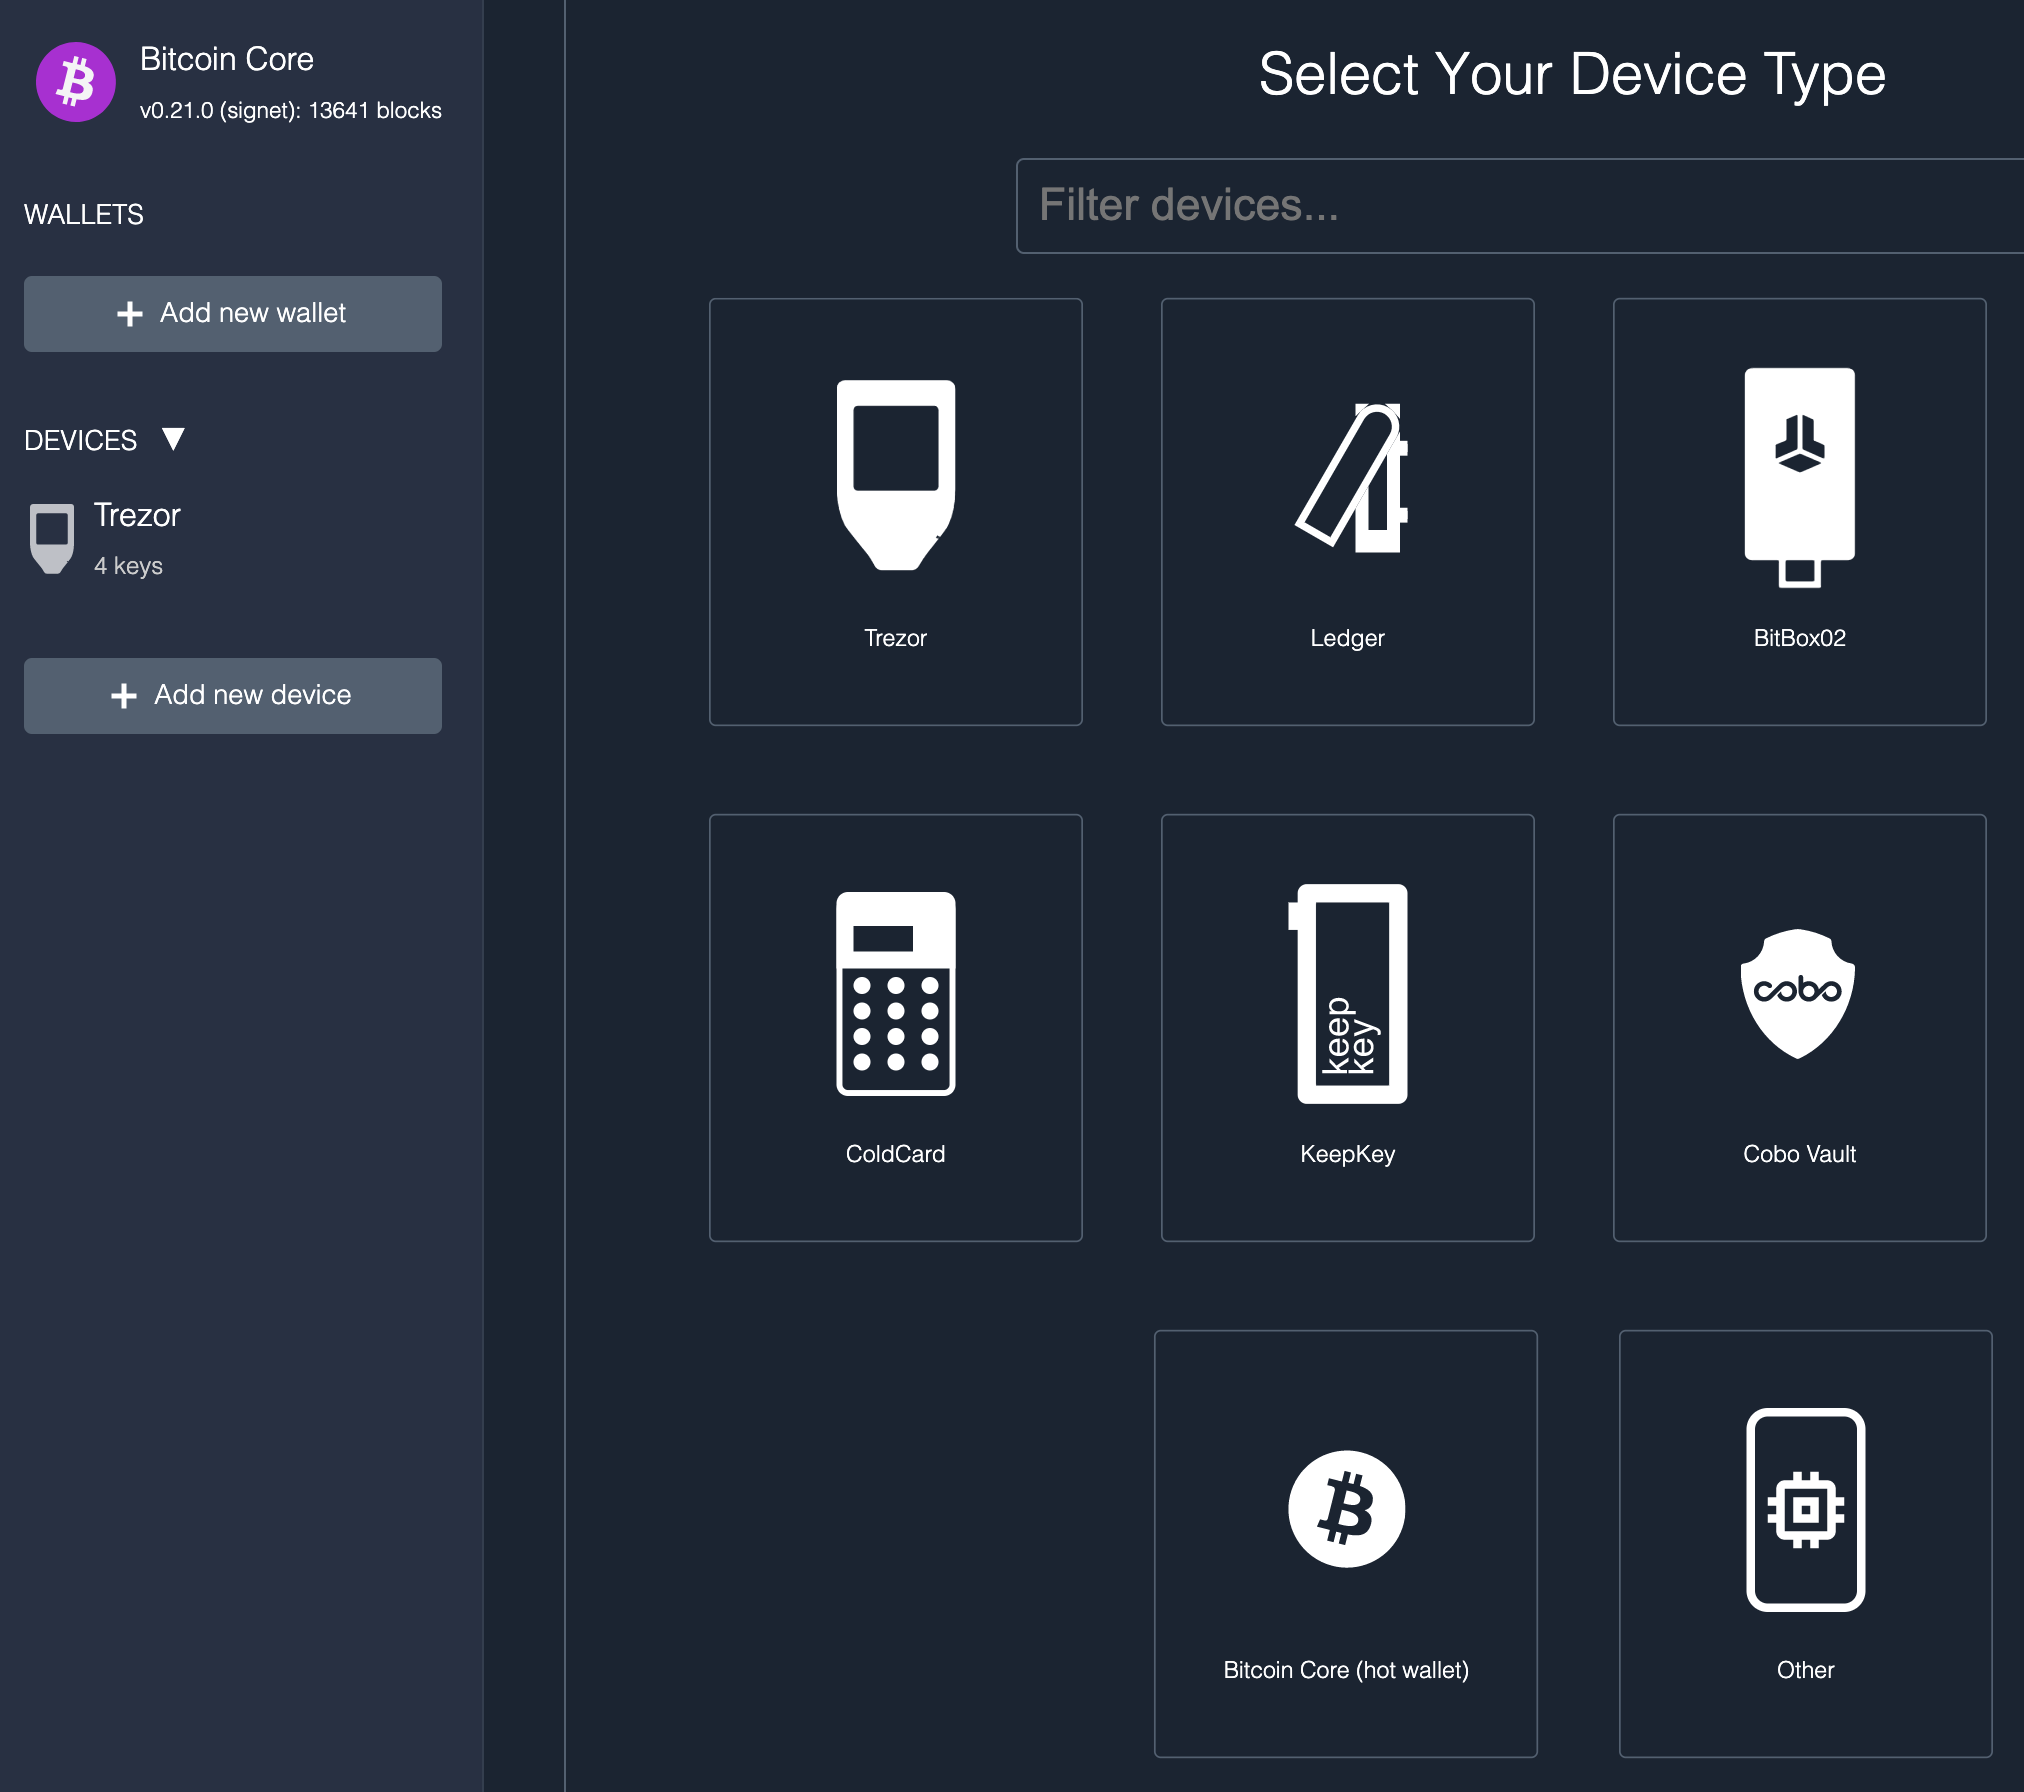
Specter should automagically detect Bitcoin Core. Click on “Add new device” and add your other wallet first.
To add nThKey, select Other in the list of device types:
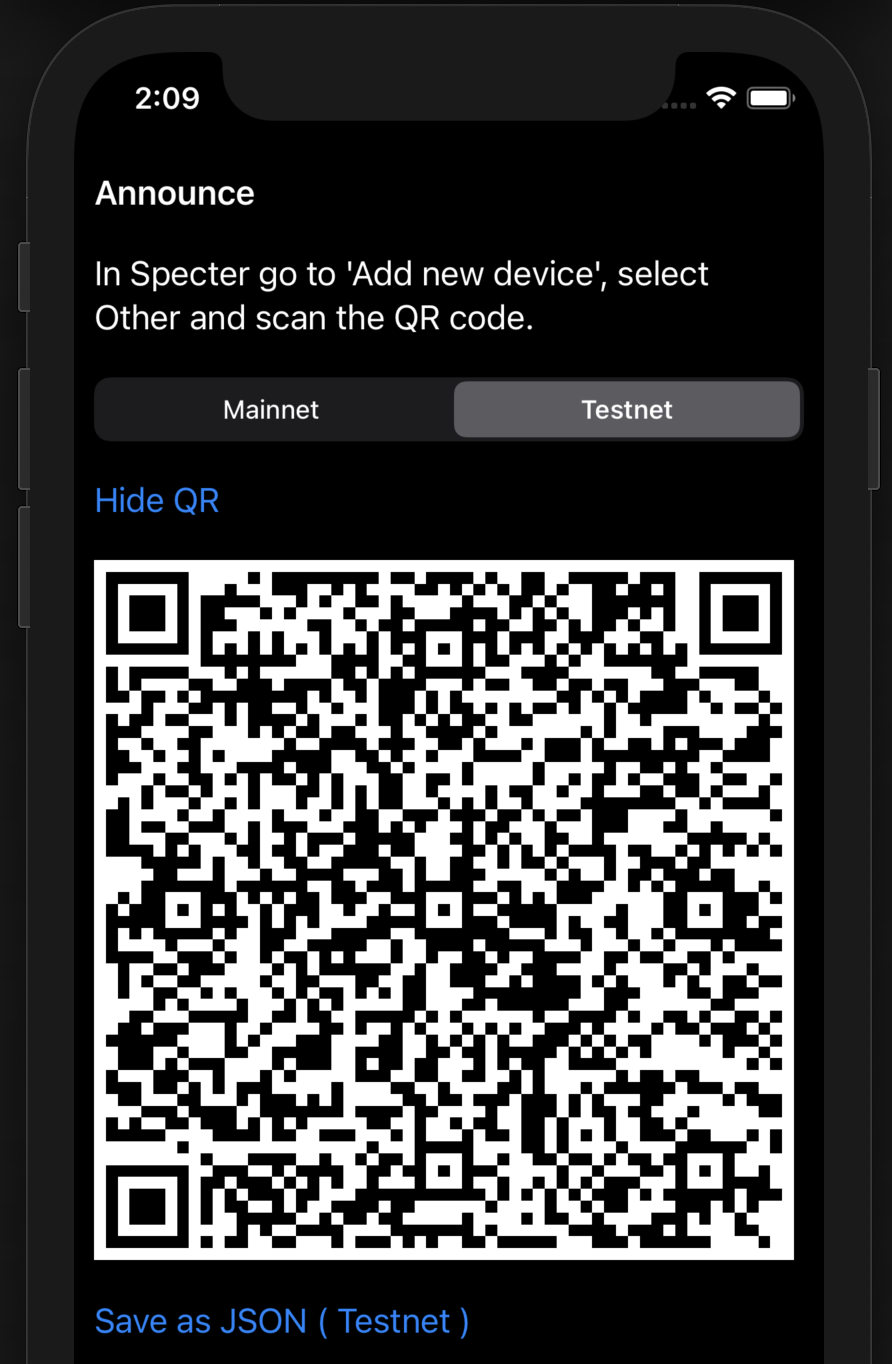
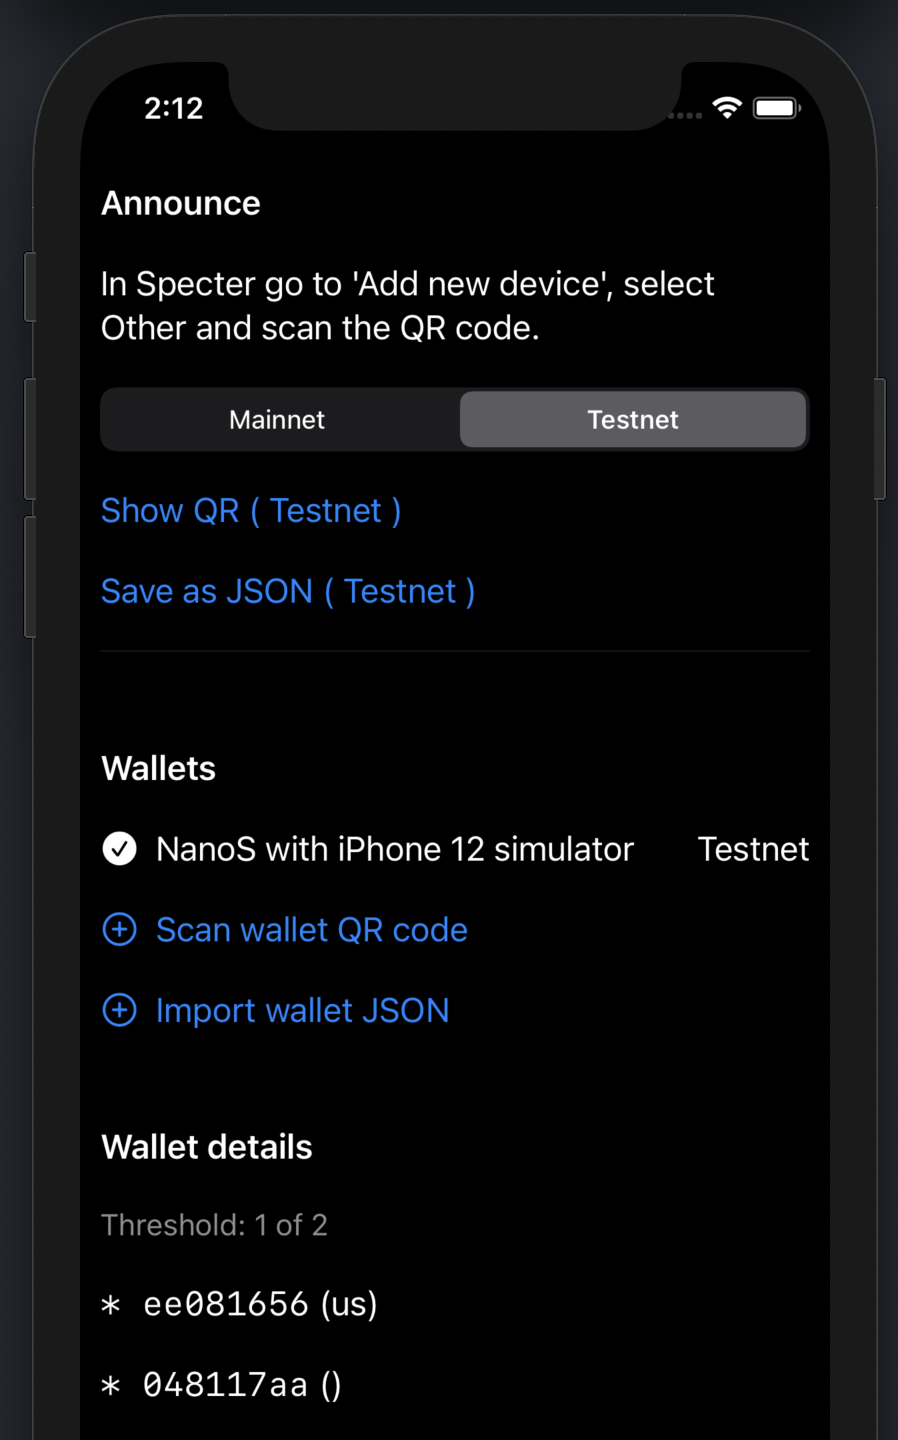
Enter a name at the top, and then click the “Scan QR code” at the bottom. In the nThKey app go to Settings and click Show QR:
It should fill in the fourth line in the table:
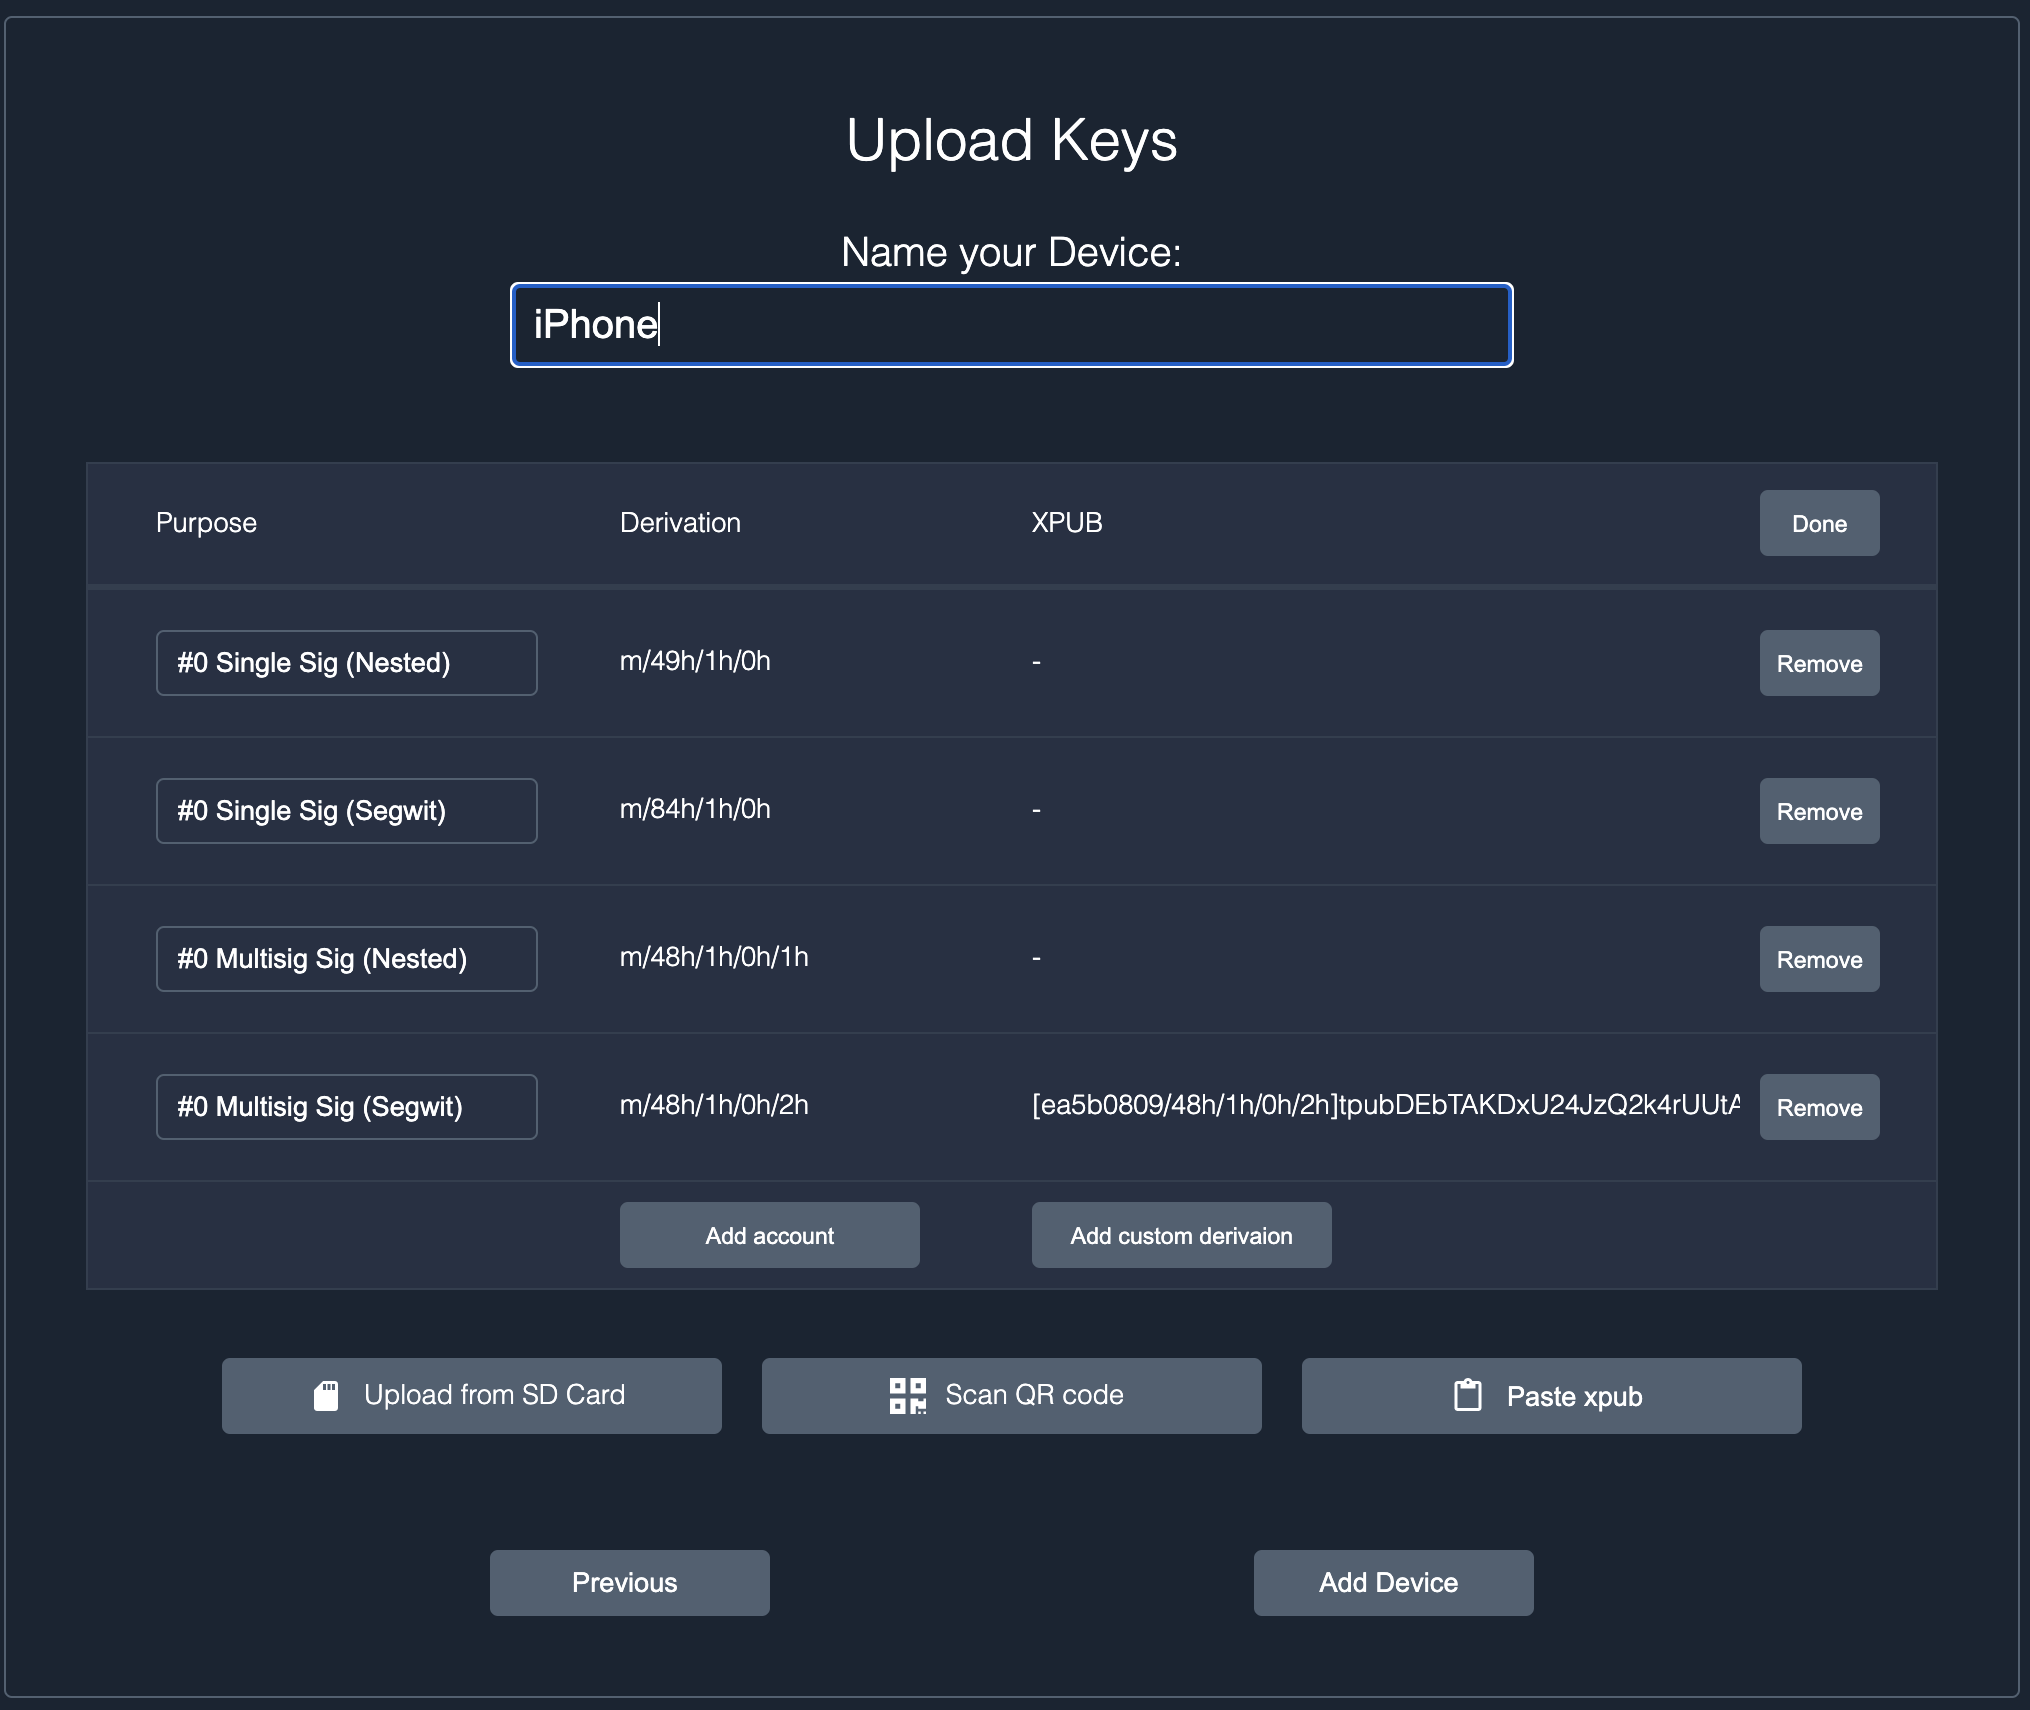
Click on Add Device to continue.
Add more devices if you like, and then click Create multisig. Select all the devices and press Continue. In the next screen, pick a name, set the threshold value, e.g. “Using 2 of 2”.
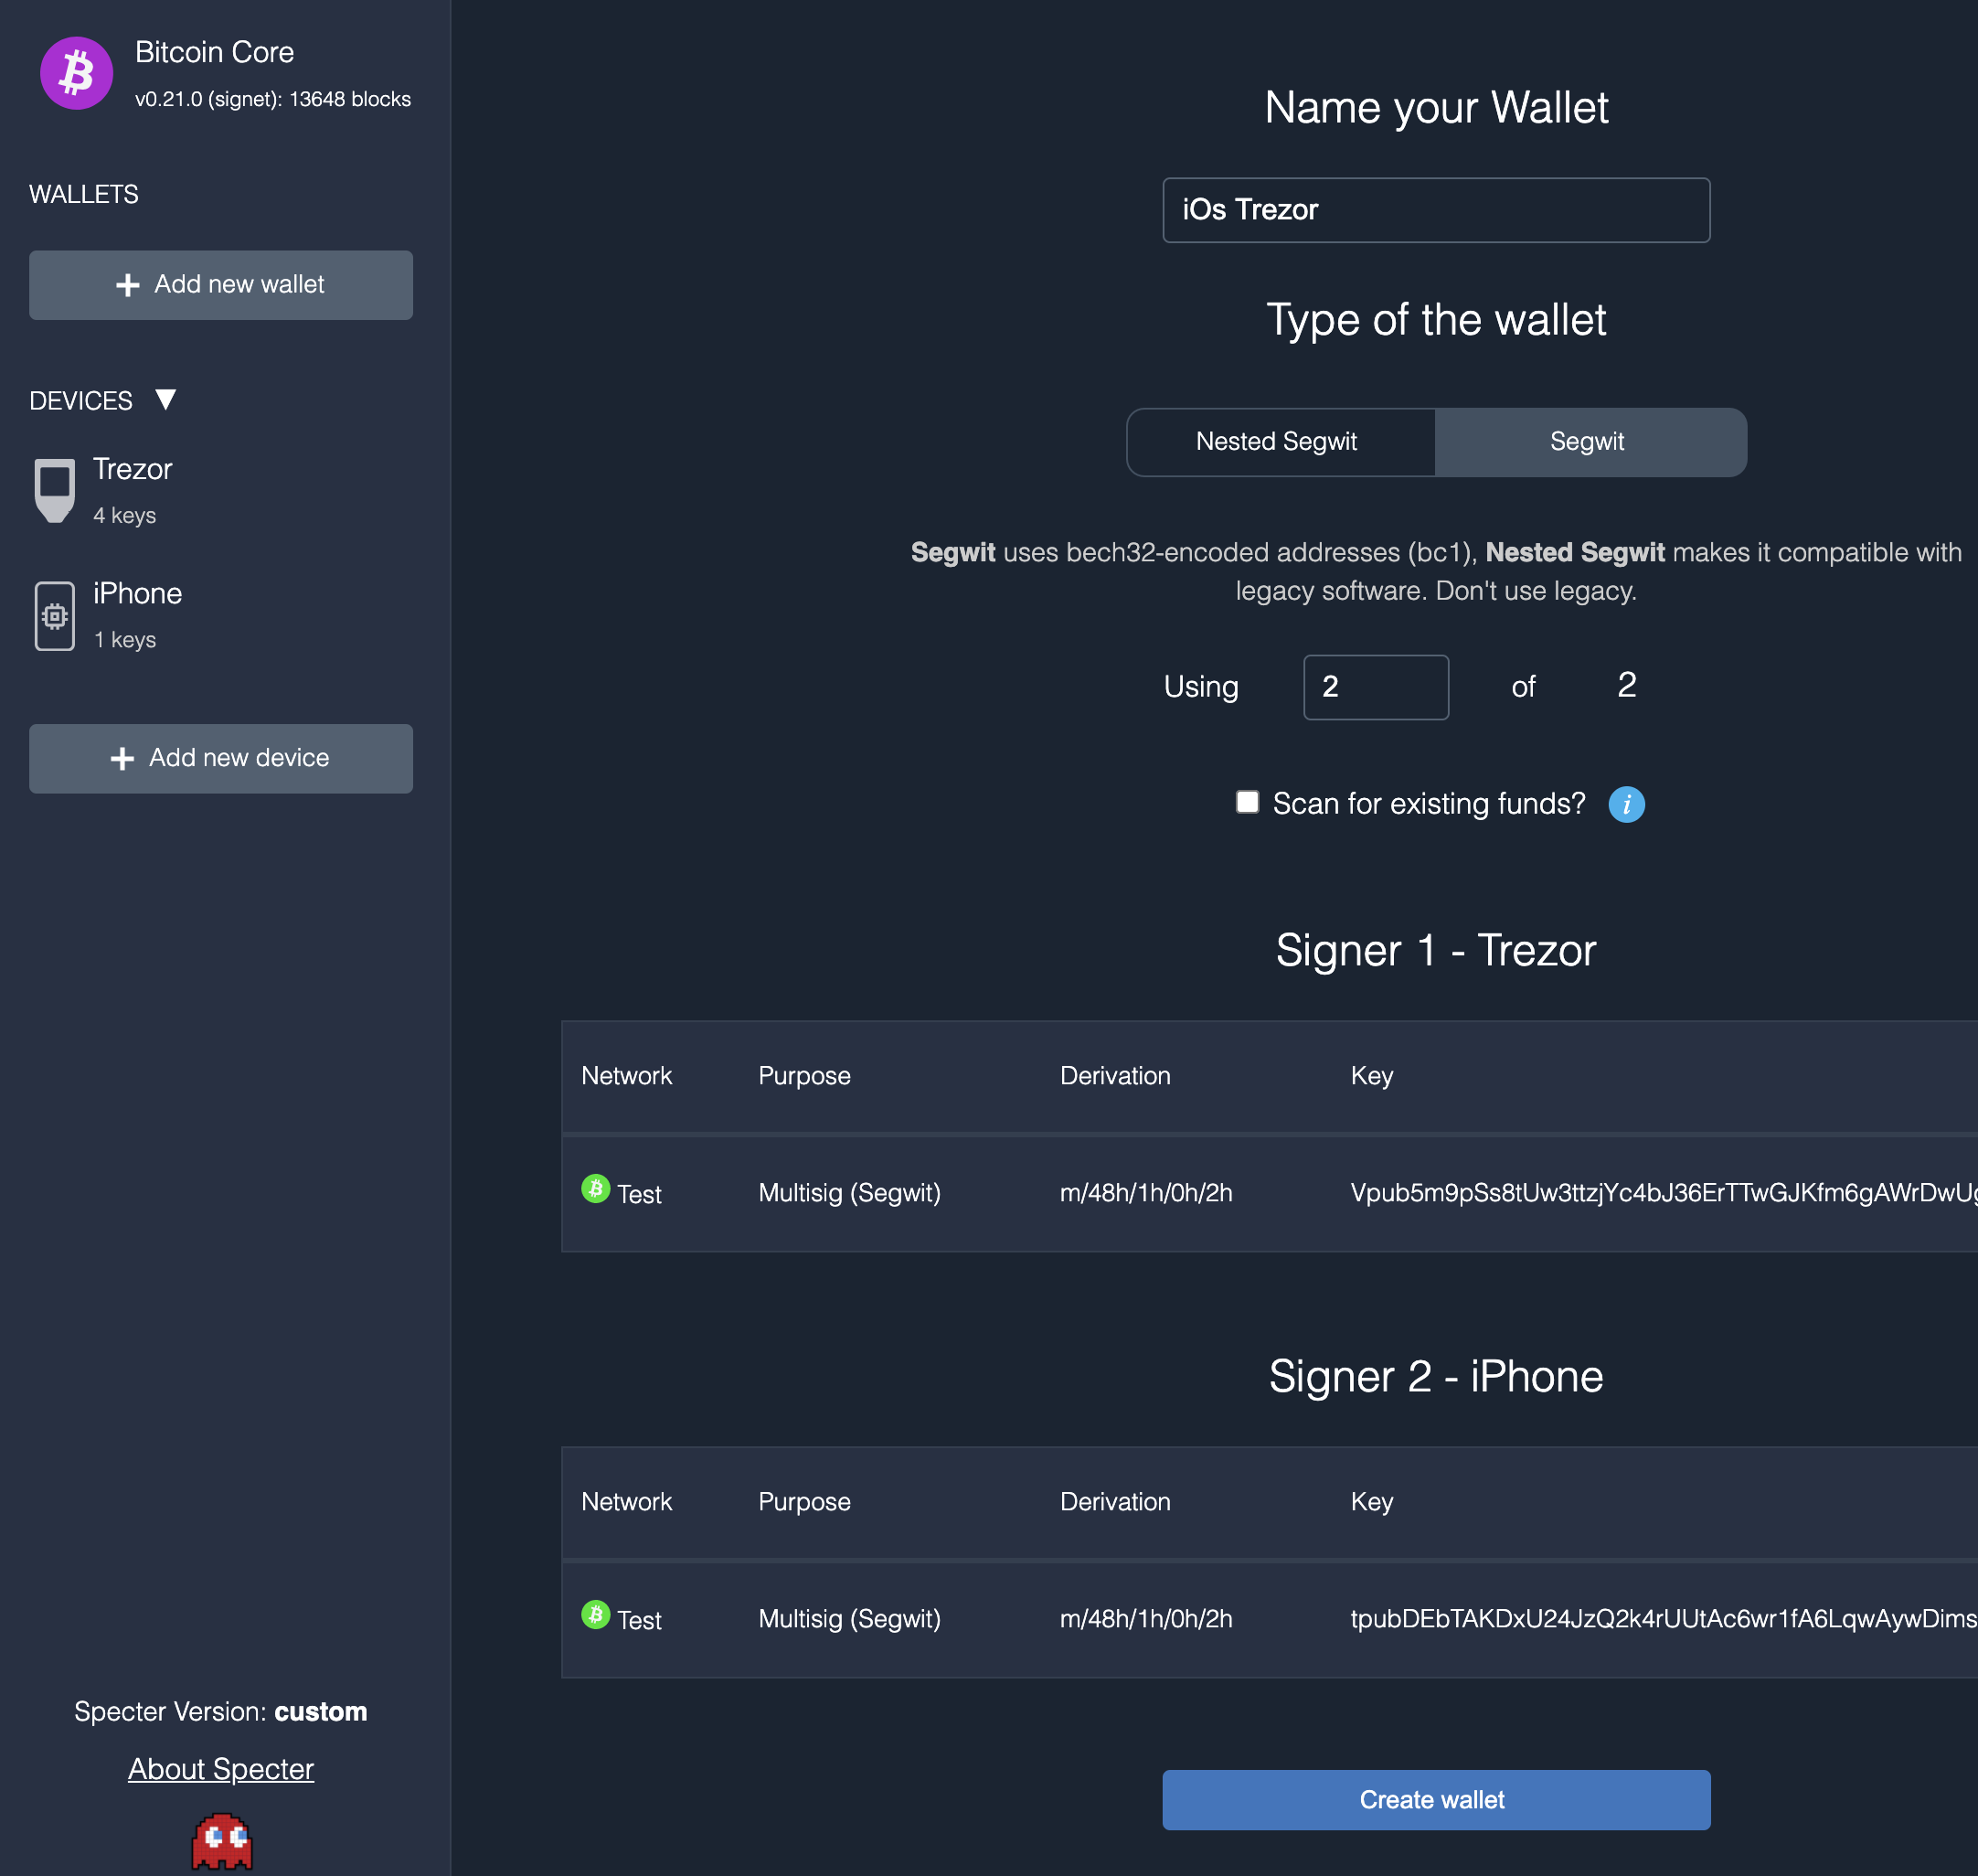
Click on Create Wallet. You should see the new wallet in Bitcoin Core as well.
In the wallet Settings, go to Export and click Export. In the app click on Scan Specter QR and scan the code. You’ll now see the wallet details.
Deposit to wallet
In Specter go to the Receive tab, you’ll see an address.
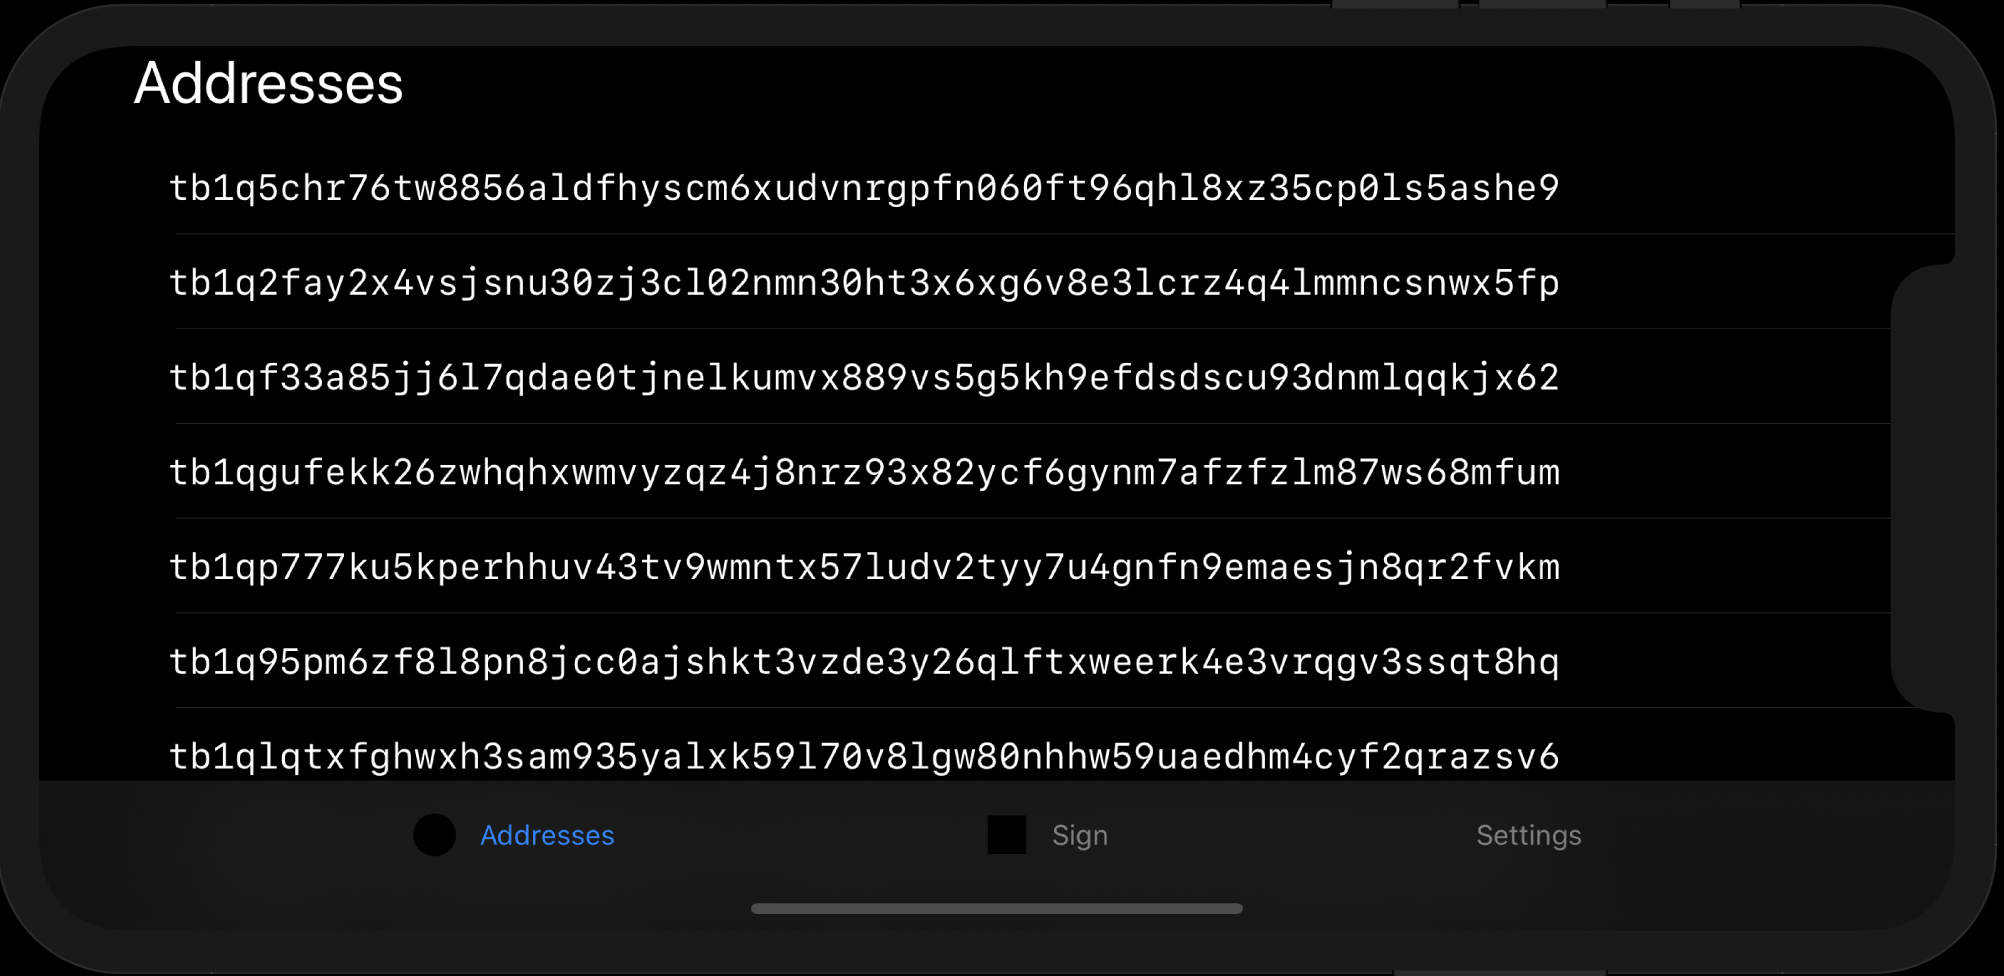
To verify the address on iOs, go to the “Addresses” tab. The Specter address should match the first address listed in the app. If possible, be sure to check this address on all your devices before sending coins to it.
To get some coins to play with, go to the signet faucet and paste your address.
Backup seed phrase and wallet details
This is a good time to backup your 24 words as well as the wallet metadata. You need both pieces of information to to restruct your multisig wallet and to be able to spend from it! This is different from a single signature wallet where typically the mnemonic is all you need to store.
In the nthKey app, go to Settings and click on Show Mnemonic to write down the recovery phrase. If you ever delete the app or get a new phone, simply install the app and type this mnemonic (more details on recovery here).
For the multisig wallet details, Specter lets you print a PDF with a QR code. After you enter your mnemonic, scan that QR code with nthKey and your wallet is back in the app.
Your mnemonic backup is valid for mainnet, testnet and signet, but each wallet requires its own (QR) backup from Specter.
Spend from wallet
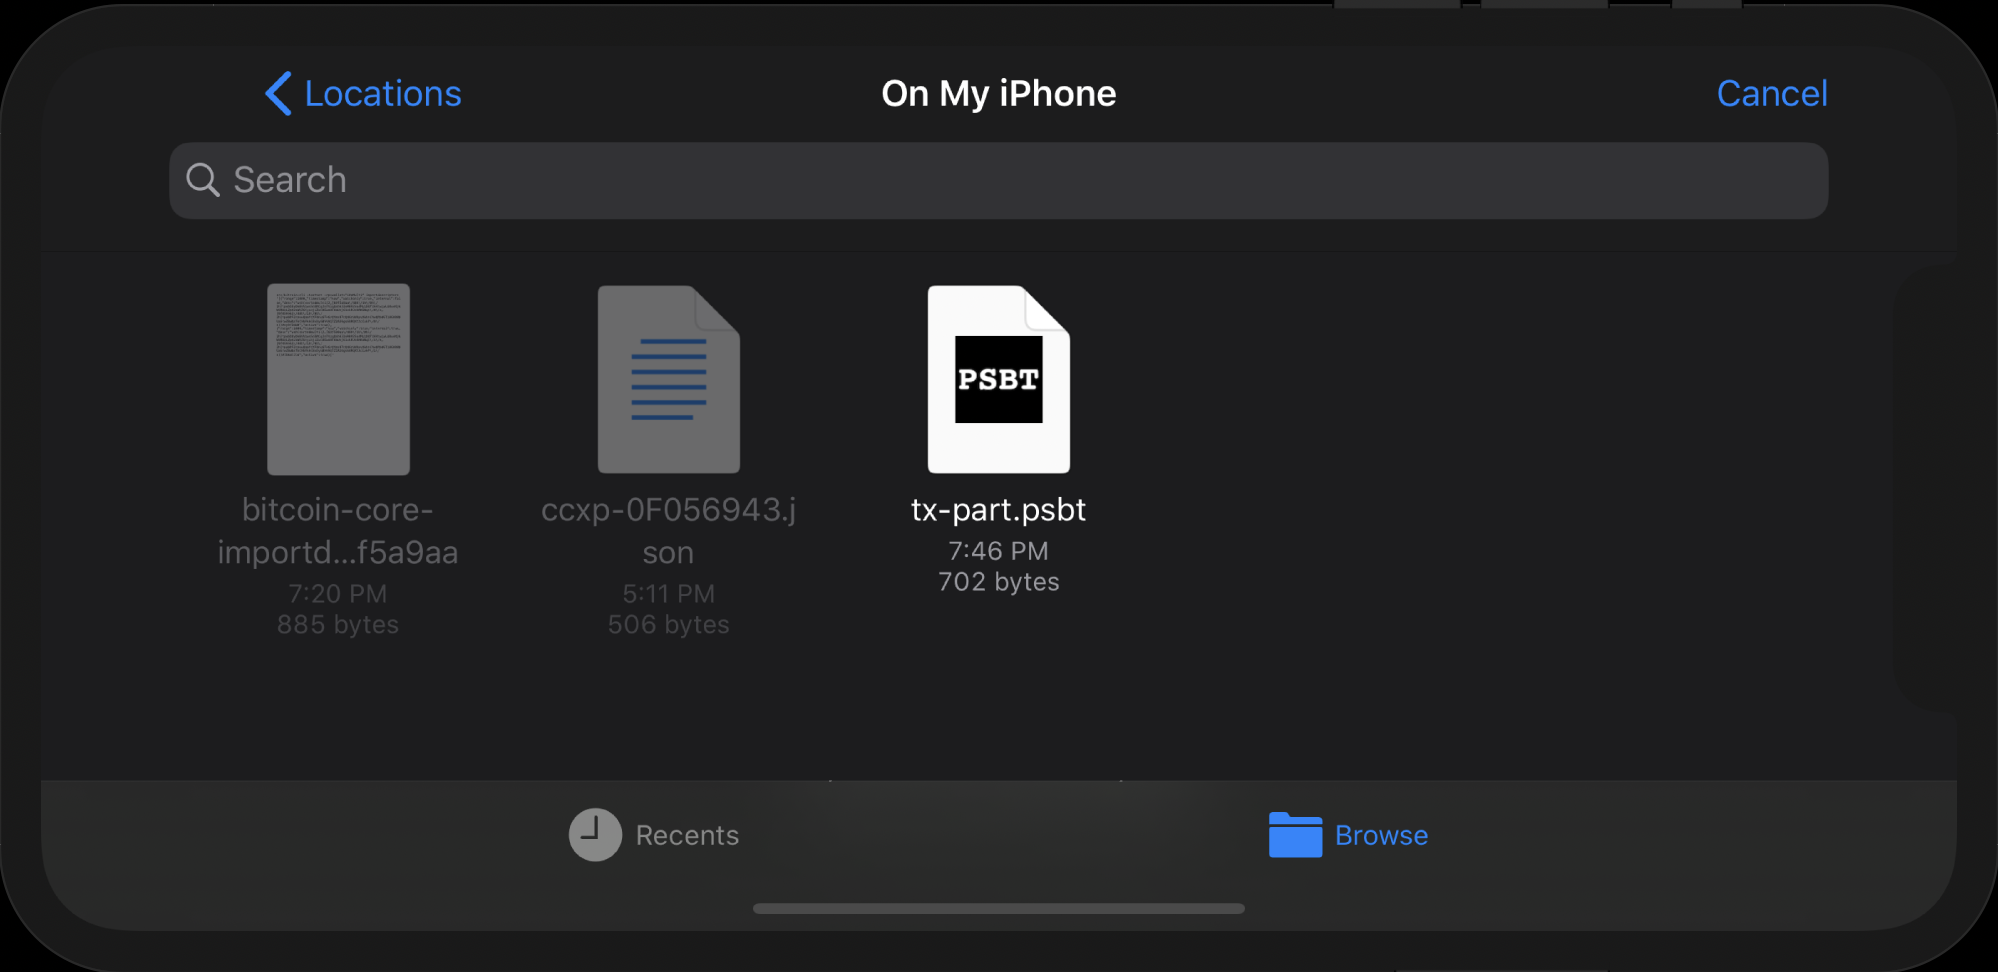
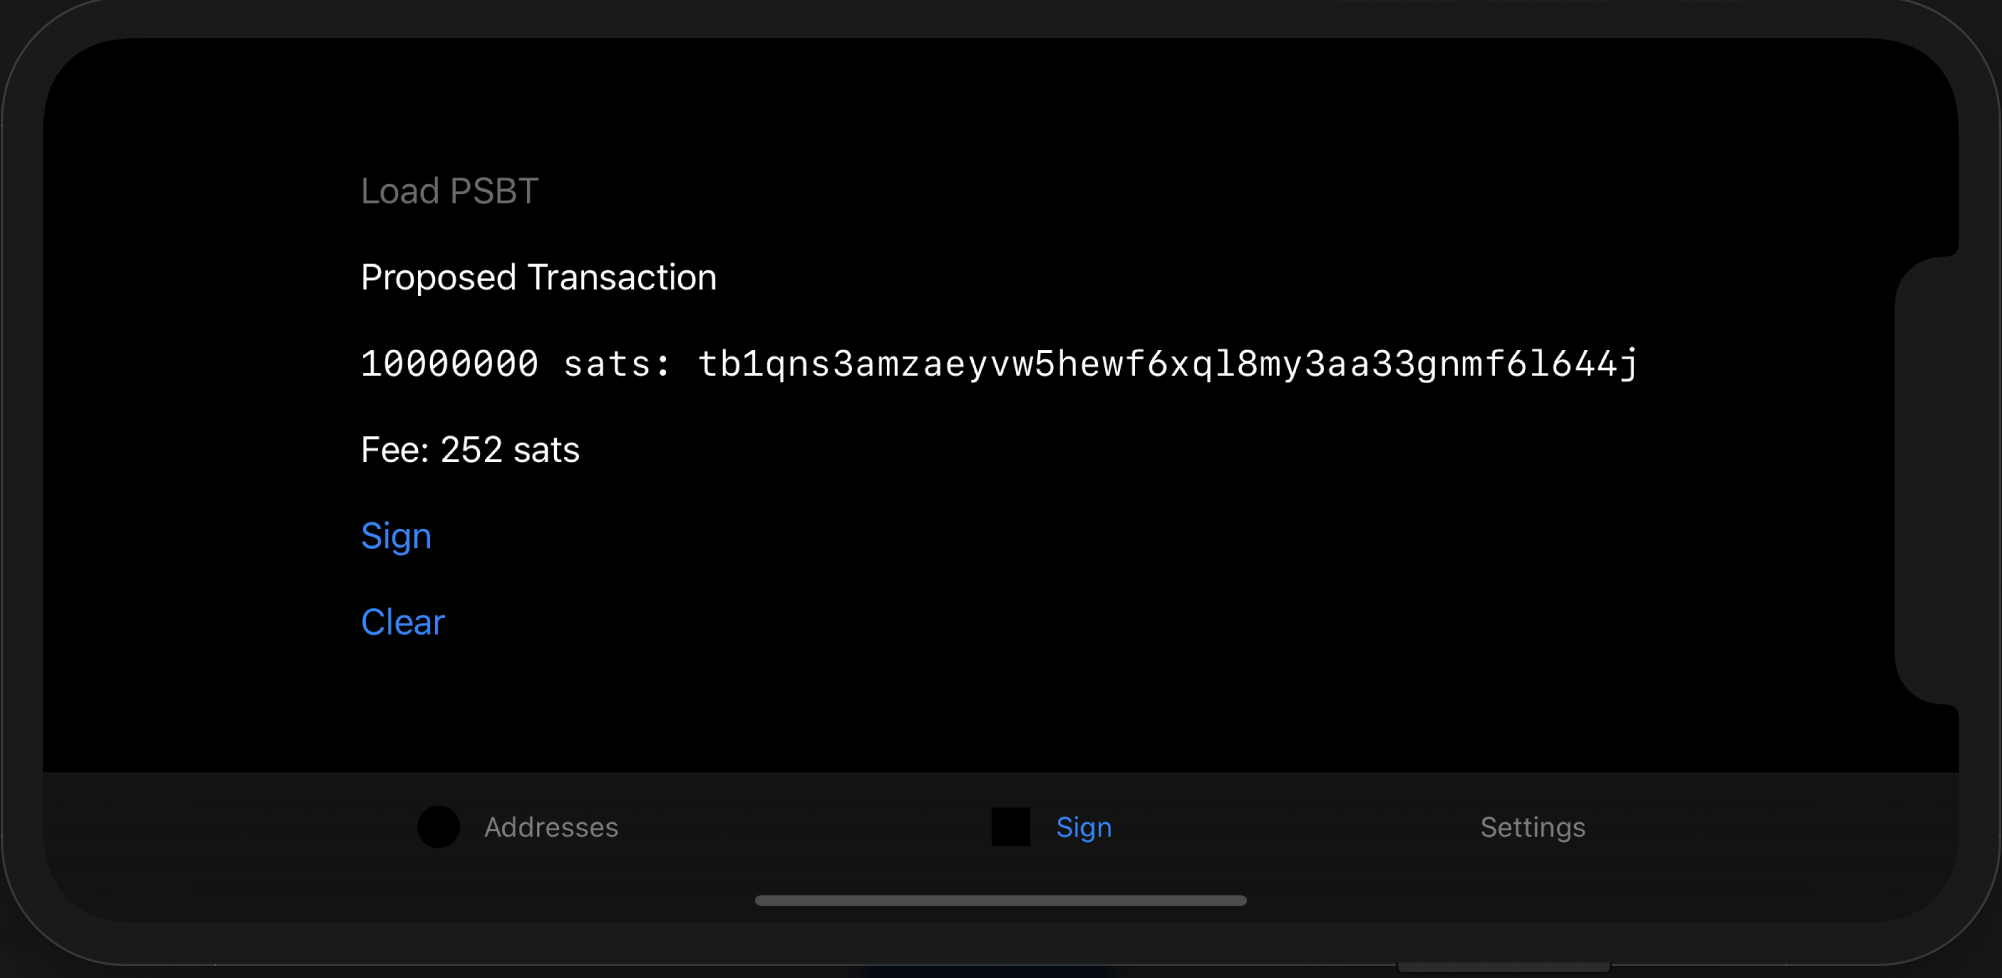
The Send screen in Specter should be pretty self explanatory. It’s easiest to scan the QR code with the app. Alternatively you can save the PSBT file in iCloud drive and load it in the app.
You can even airdrop it to the device and it will open the app.
Carefully check the destination address:
Remember, if there is malware on your computer, the address in Specter might still match what you see on the phone, but it belongs to the attacker. You should always verify the destination address via a different channel.
After you sign it, return the resulting signature via the QR code on the phone, or store it on iCloud Drive and load it with Specter.